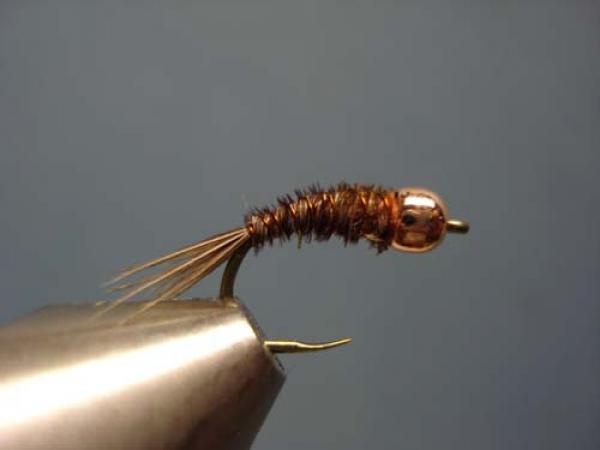
Bead Head Pheasant Tail Nymph
Fly and Photos by Loren Williams
This pattern is a variation of the American Pheasant Tail nymph as popularized by Al Troth, which is really an embellished version of Frank Sawyer's original Pheasant Tail Nymph.
Bead Heads, placing metal beads onto hook shanks for added flash and weight, is not anything new. I'm not certain of the complete history behind the process, but bead head flies gained momentum out of the competition fly-fishing circuit in Eastern Europe and Scandinavia where the prohibition of accessory leader weight made weighting flies and art form. With the advent of heavier Tungsten beads, the possibility now exists to tie very heavy, yet slim flies on all hook sizes. By eliminating weight on the leader, anglers can now angle to fish in deep fast water and maintain contact with their flies-an important concept!
The Bead Head Pheasant Tail nymph shown here is but one variation, but indeed it is exactly how I tie and fish it for my personal use. I typically carry these in sizes #14 through #18 tied on barbless scud hooks. I like the gap to negate the gap-closing bead, and I feel they give a better bite. Barbless hooks are a mainstay in my arsenal and I use manufactured blarbess hooks when possible.
Notice that the pattern is about "plain Jane" as can be; but rest assured that this pattern and some slightly modified cousins have taken hundreds of trout, whitefish, and grayling! Some may argue the needs for legs, but for me it is an unnecessary added step. Likewise with the peacock thorax. Sawyer's original model lacked both and it continues to fish well to this day!
MATERIALS
Hook: TMC 2499SPBL
Bead: Copper Tungsten
Weight: Fine lead wire
Thread: Brown
Tail: Cock Pheasant Tail Fibers
Rib: Fine Copper Wire
Abdomen: Cock Pheasant Tail fibers; wrapped
Click photos to enlarge!
|
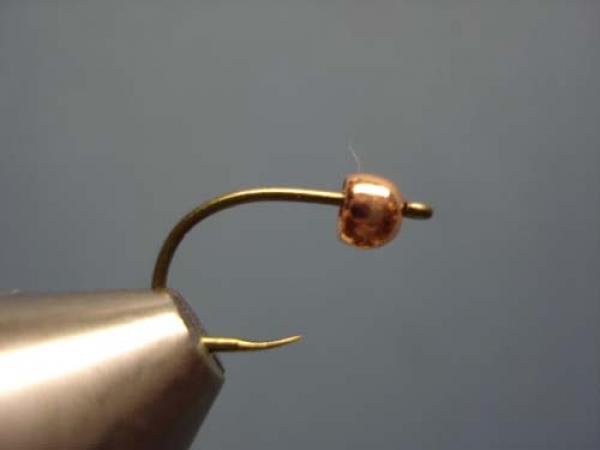
Slip bead onto the barbless hook and place firmly in your vise. |
|
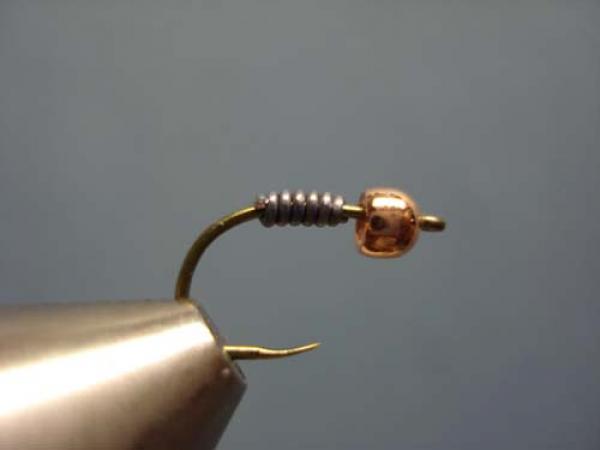
Wrap lead around middle 1/2 of shank. |
|
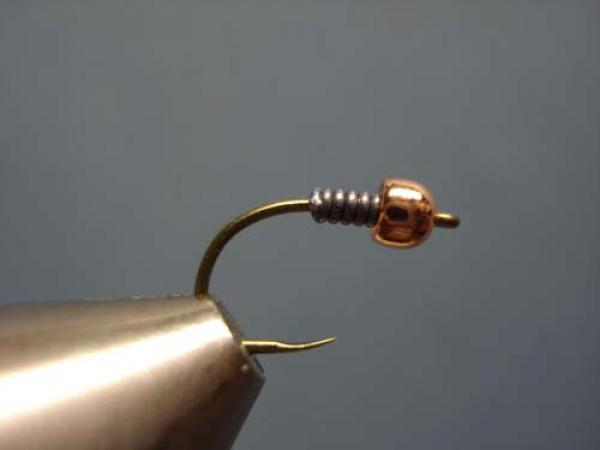
Slide lead coil up into the bead. |
|
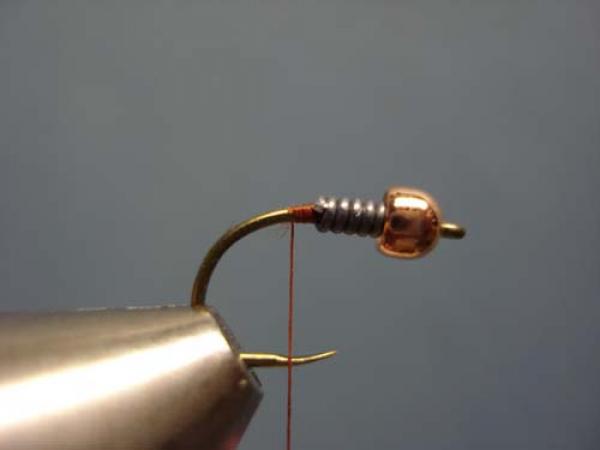
Start thread behind the lead coil to secure it in place and begin to build a taper. |

|
Use the thread to taper-off the rear end of the lead coil, a few wraps over the lead will fill in the gaps. End the thread at the rear of the hook, slightly around the bend. |
|
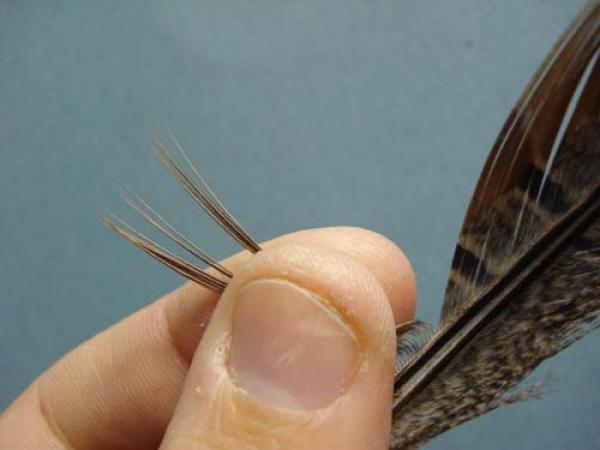
Select a few barbs from a rooster pheasant tail, even the tips before removing. |
|
Measure the tips to be equal to 1/2 to 3/4 the hook length. |

|
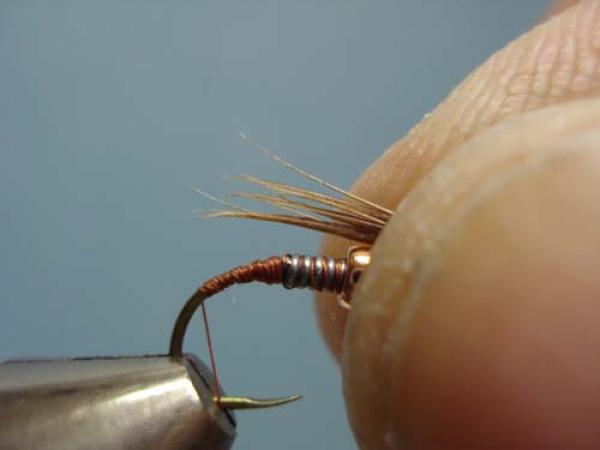
Start with the bundle on the near side of the hook and make one wrap to secure the bundle. |

|
Use the second wrap's tension to roll the fibers into place on top of the hook. 2 wraps will hold the bundle in place for now. |
|
Gently lift the butt ends up and to the rear as you advance the thread forward using very tight wraps. This will lock in the tail. End at the lead coil. |

|
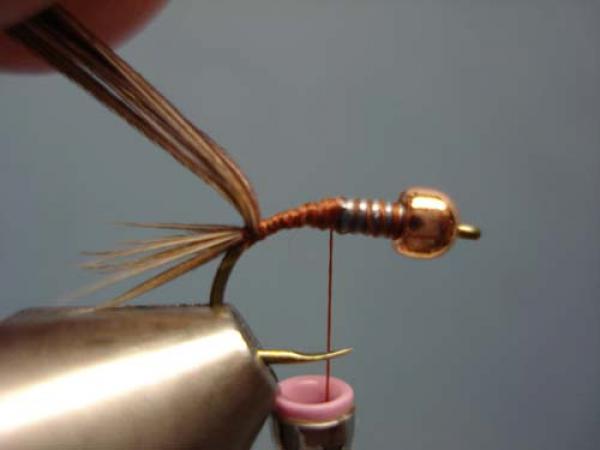
Select a section of fine copper wire and secure it to the far side of the hook. |
|
Bind it to the far side back to the tail. Advance your thread to the rear of the bead. |
|
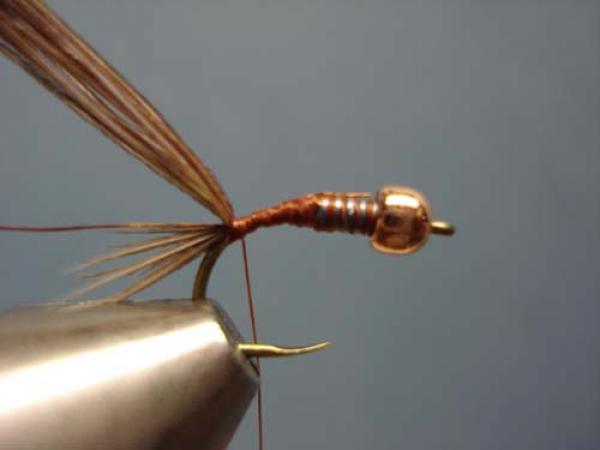
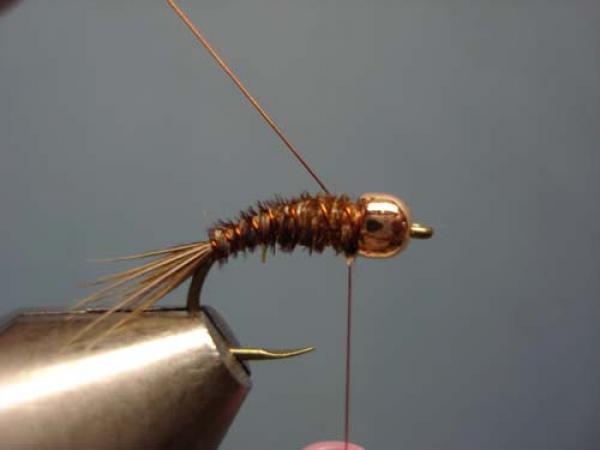
Wrap the PT fibers forward, they will twist as you wrap them building a taper of their own. This job is immensely easier using the rotary feature of your vise. Tie off the fibers behind the bead. |

|
Snip the excess close. |
|
Wrap the copper rib by "counter-wrapping" or wrapping in the reverse direction than you did for the PT fibers. This will boost durability and allow the ribbing to show more clearly. The final wrap passes in front of the thread on the near side of the hook. |
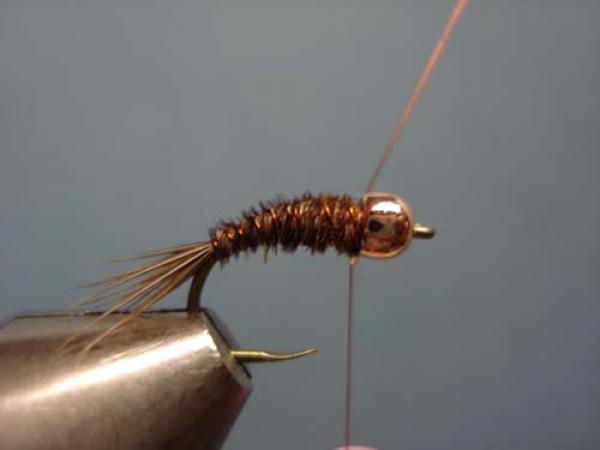
|
Wire passes underneath and up on the far side. |
|
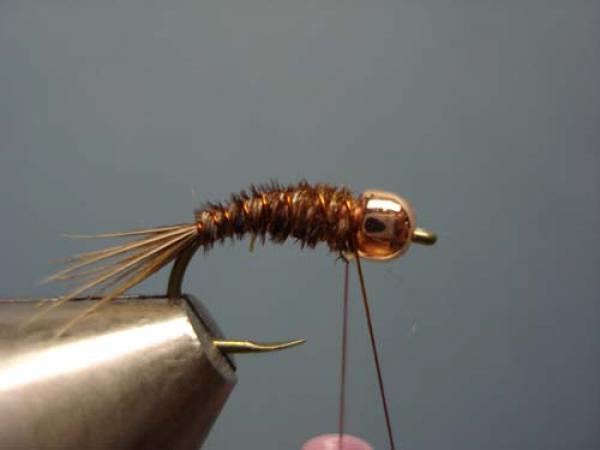
Angle the wire to the rear and one wrap of thread will secure it in place. |

|
Clip the wire and make 3 more tight thread wraps then whip finish. |
|
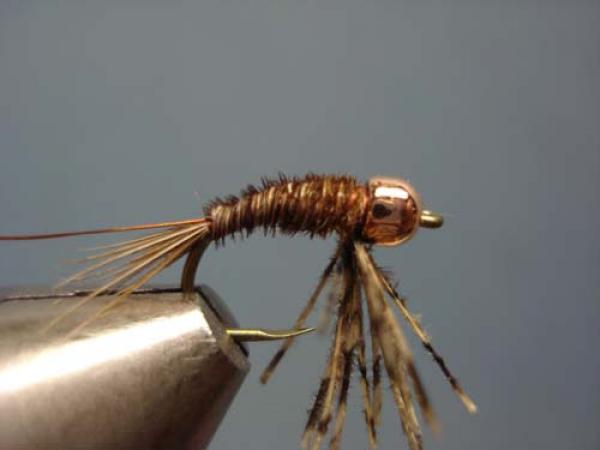
A completed Bead Head Pheasant Tail Nymph. |