Shuttle Weave
Fly and Photos by Loren Williams
What follows is a pseudo-tutorial. I am unable to photograph the actual weave since it requires both of my hands and firm, constant tension to complete. What I have done is used twisted wire in place of the usual flosses and yarns for the weave. The wire holds it's shape and place allowing me to let go of the material for purposes of photographing the steps. I have not actually tied a fly per se, but you can substitute this tutorial in any woven fly tutorials I do since I am fond of the shuttle weave and use it almost without exclusion.
Please pay particular attention to the underbody (or form as Vladi taught it to me) since this is the foundation over which the weave will be built. If the form is not representative of the insect you are imitating, or if it has gaps and bumps, even the tightest weave will be for naught.
For purposes of the tutorial, I recommend you select a large hook, and two different colors of quality vernille for the weave. Vernille is stout and somewhat wirey so that it will behave nicely until you get the hang of it. I would lay the lead wire foundation and overlay it with waxed "A" nylon to practice building the form. I have demonstrated a caddis larva/pupae form, but a wide and flat stonefly nymph form is also well suited to this weave. For that application I would bind a length of .030" or ,035" wire to the sides of the hook shank versus wrapping the shank.
For now, I would advise against tying an actual fly. Just learn the form and how to weave over it.
Let's get to work...
|
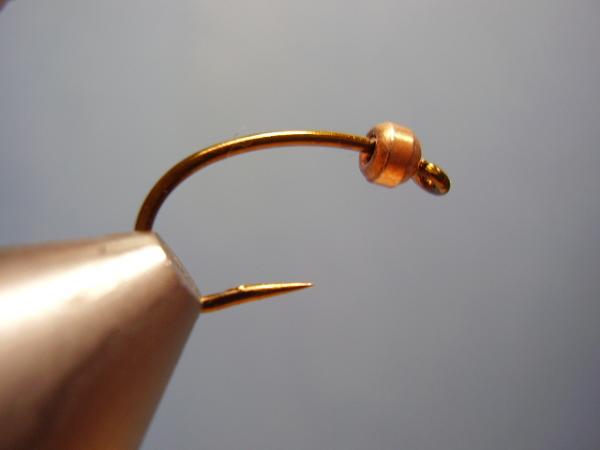
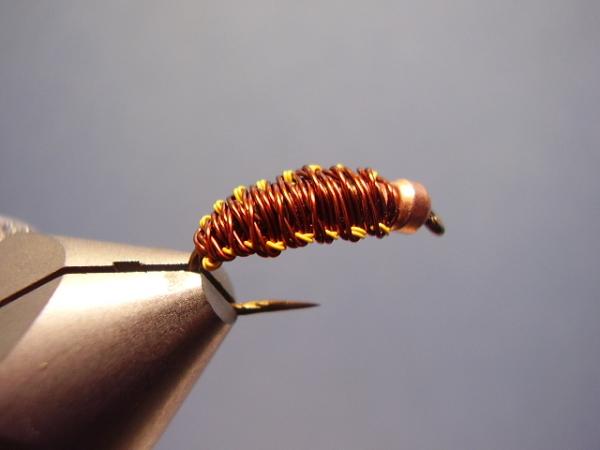
Place the (hopefully) debarbed hook in your vise. I have added a copper bead to show relationship between beads, if used, and the form and weave. |

|
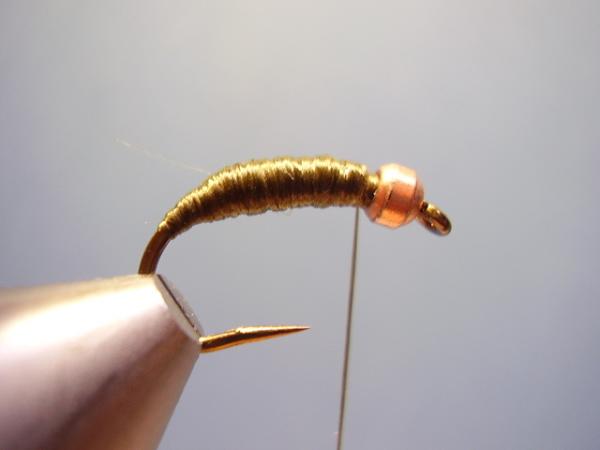
Wrap the shank with lead wire to cover the middle 2/3's. Wiggle either end of the wire to break it cleanly and so that the ends taper. Vladi uses the handle of his scissors to flatten the rear edge before he wraps it, and uses a fine pliers to flatten the front edge before he breaks it. Wire diameter is dependent on the effect you wish to achieve. In this case I am using .025" on a #8 CO68. |
|
Attach a neutral colored (as it relates to the weave colors) Flat "A" nylon thread to the hook somewhere amidst the lead wire. If you try to attach it in front or behind, the thread will end up pushing the wire around. This way you can secure the wire to the hook and begin to form the underbody. |
|
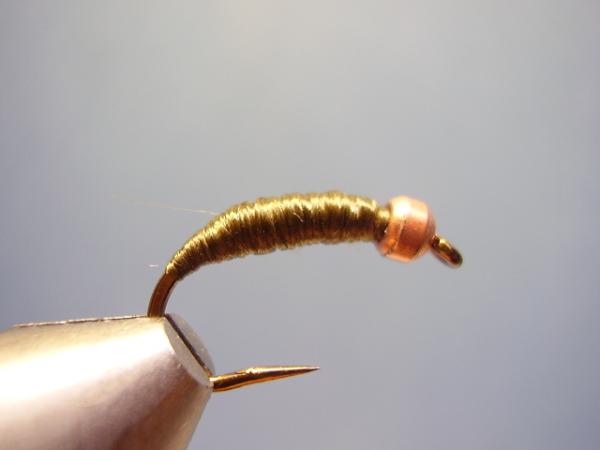
Continue to build the body using the nylon, filling the gaps between the wire wraps and tapering the leading ends. |
|
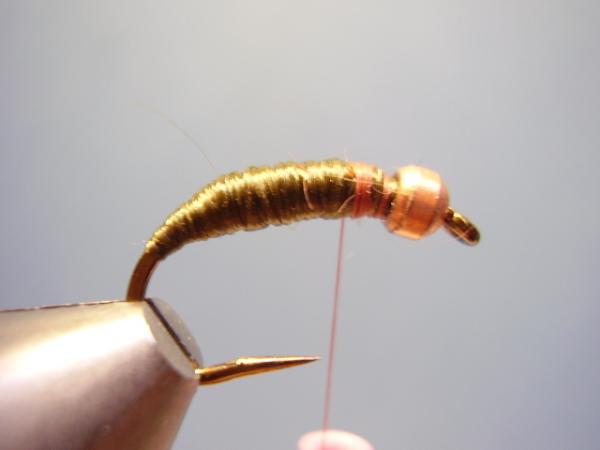
Attach some 6/0 thread at the front of the body. The thread should be the color of one of the weave materials, I feel the color of the dorsal (top) color should be matched. |

|
The top (usually darker) color weave material is attached to the near side of the hook shank and bound back down around the bend of the hook. Return the thread to the front. Note: I am using twisted copper wire ONLY for effect. |

|
Repeat the process with the bottom weave color (usually the lighter color). Return the thread to the front, whip and clip. |

|
Ready to weave?!?! |

|
Invert the fly, or rotate your vise as shown. |
|
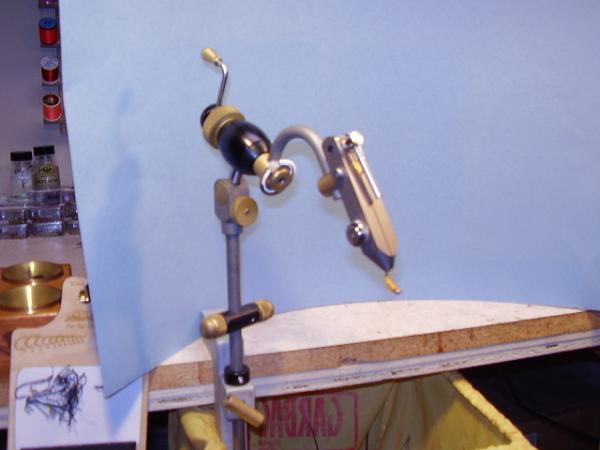
Turn your vise jaws to point toward you, be sure the hook is angled down so you can clearly see the belly of the fly. My vise has the ability to do all of this without removing the hook.At no time will you switch hands. |
|
Step one of the weave: pull the light color to the right. |
|
Step two: wrap the dark color over the light and behind the hook. My finger is only there for contrast, in reality I would be holding the brown material to the left and behind the hook. |
|
Step three: bring the light color back around the underside of the hook and up behind the dark color. |
|
Step four: hinge the dark color around the light color and bring it back across the rear of the hook. |

|
Repeat step one. |

|
Repeat step 2. |
|
Repeat step 3. |

|
Repeat step four. |

|
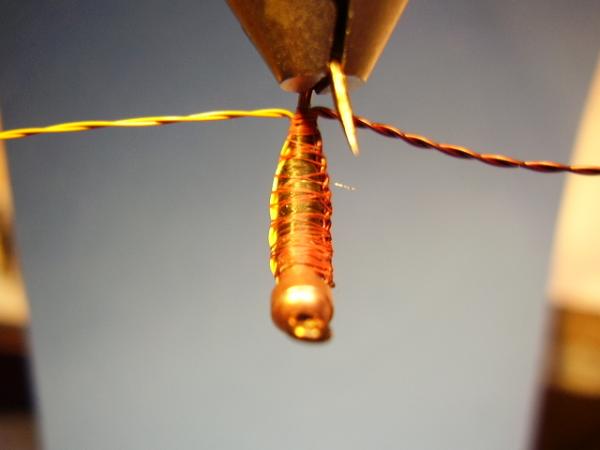
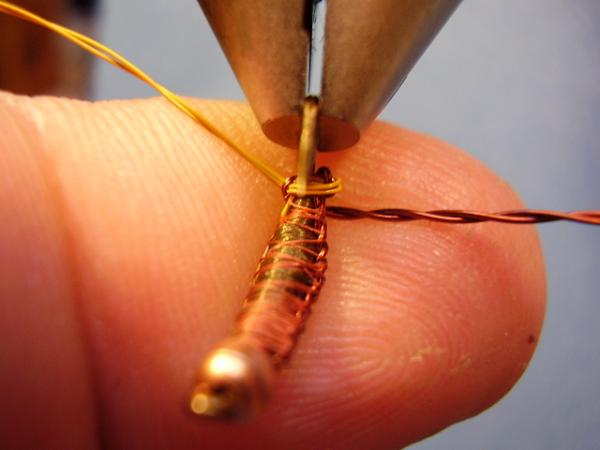
Continue with the weave cycles until you reach the bead. Notice that all I am doing is keeping the light color on the bottom and the dark color on the top. Weave tension is crucial to keeping the junctions aligned. You must never let go of the material or lose tension. It is best to maintain perpendicular tension with the light color so that you can keep the junctions in place as you wrap the dark color. |
|
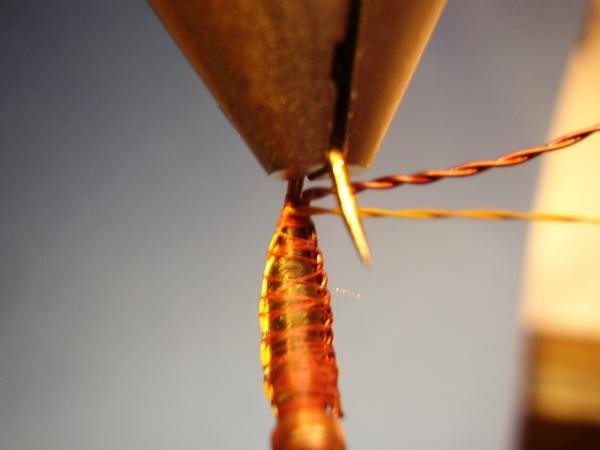
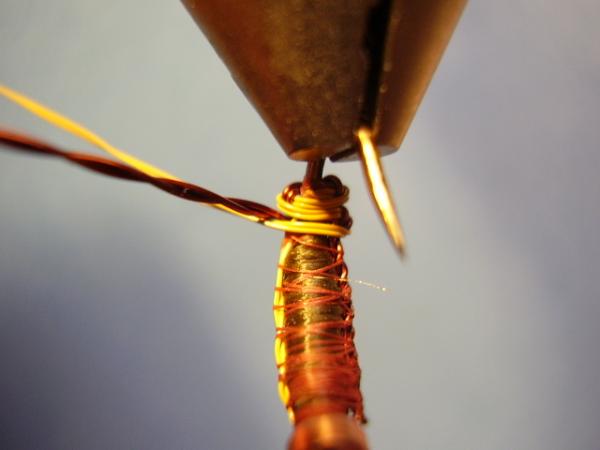
Once at the front, tie an overhand knot with the materials. |

|
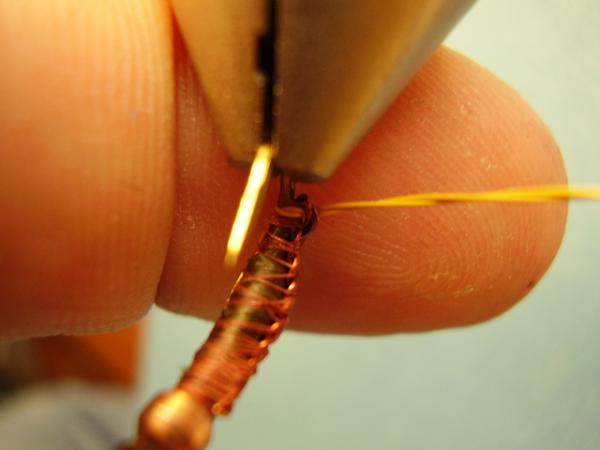
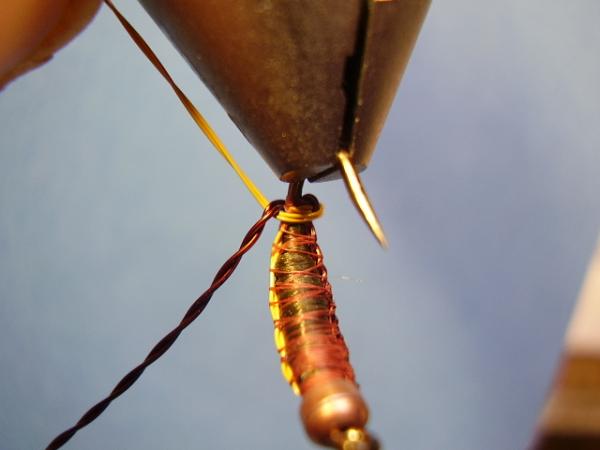
Tighten the knot and clip the materials. |
|
This view shows how my vise jaws are both inverted (rotary feature) and slanted (friction knuckle on the standrod) and my bearing housing is rotated to face me--this means I never had to move the hook! |
|
The dorsal view showing the weave. |
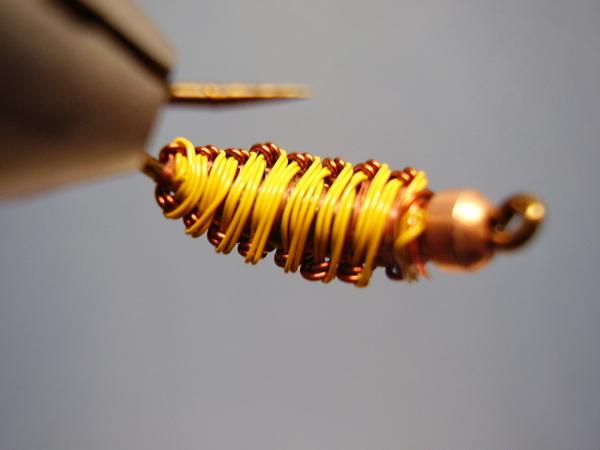
|
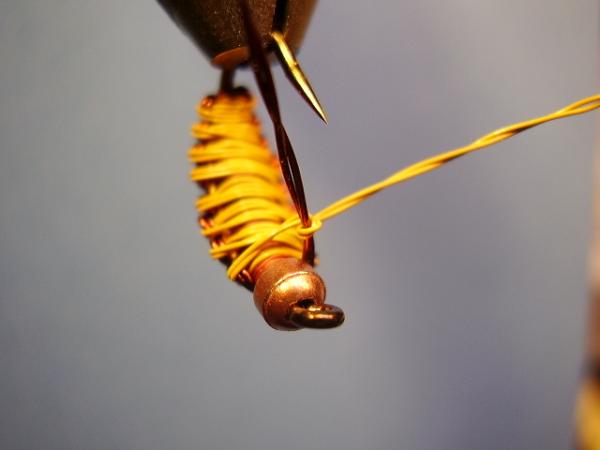
Ventral view. Notice how the junctions line up and the dark portions form little bumps. These imitate the leg buds on a caddis larva. If you were to add a counter-rib (I always do) then the ribbing is to go in between the legs in order to look proper. Since I'm not as good as Vladi, Jay, or Oliver, I cheat and use monofilament for my ribbing! SSHHHHH.... Remember: It's going to take some time and trail and error to get the weave to work for you. No time like the present and keep at it! Tight wraps... |